


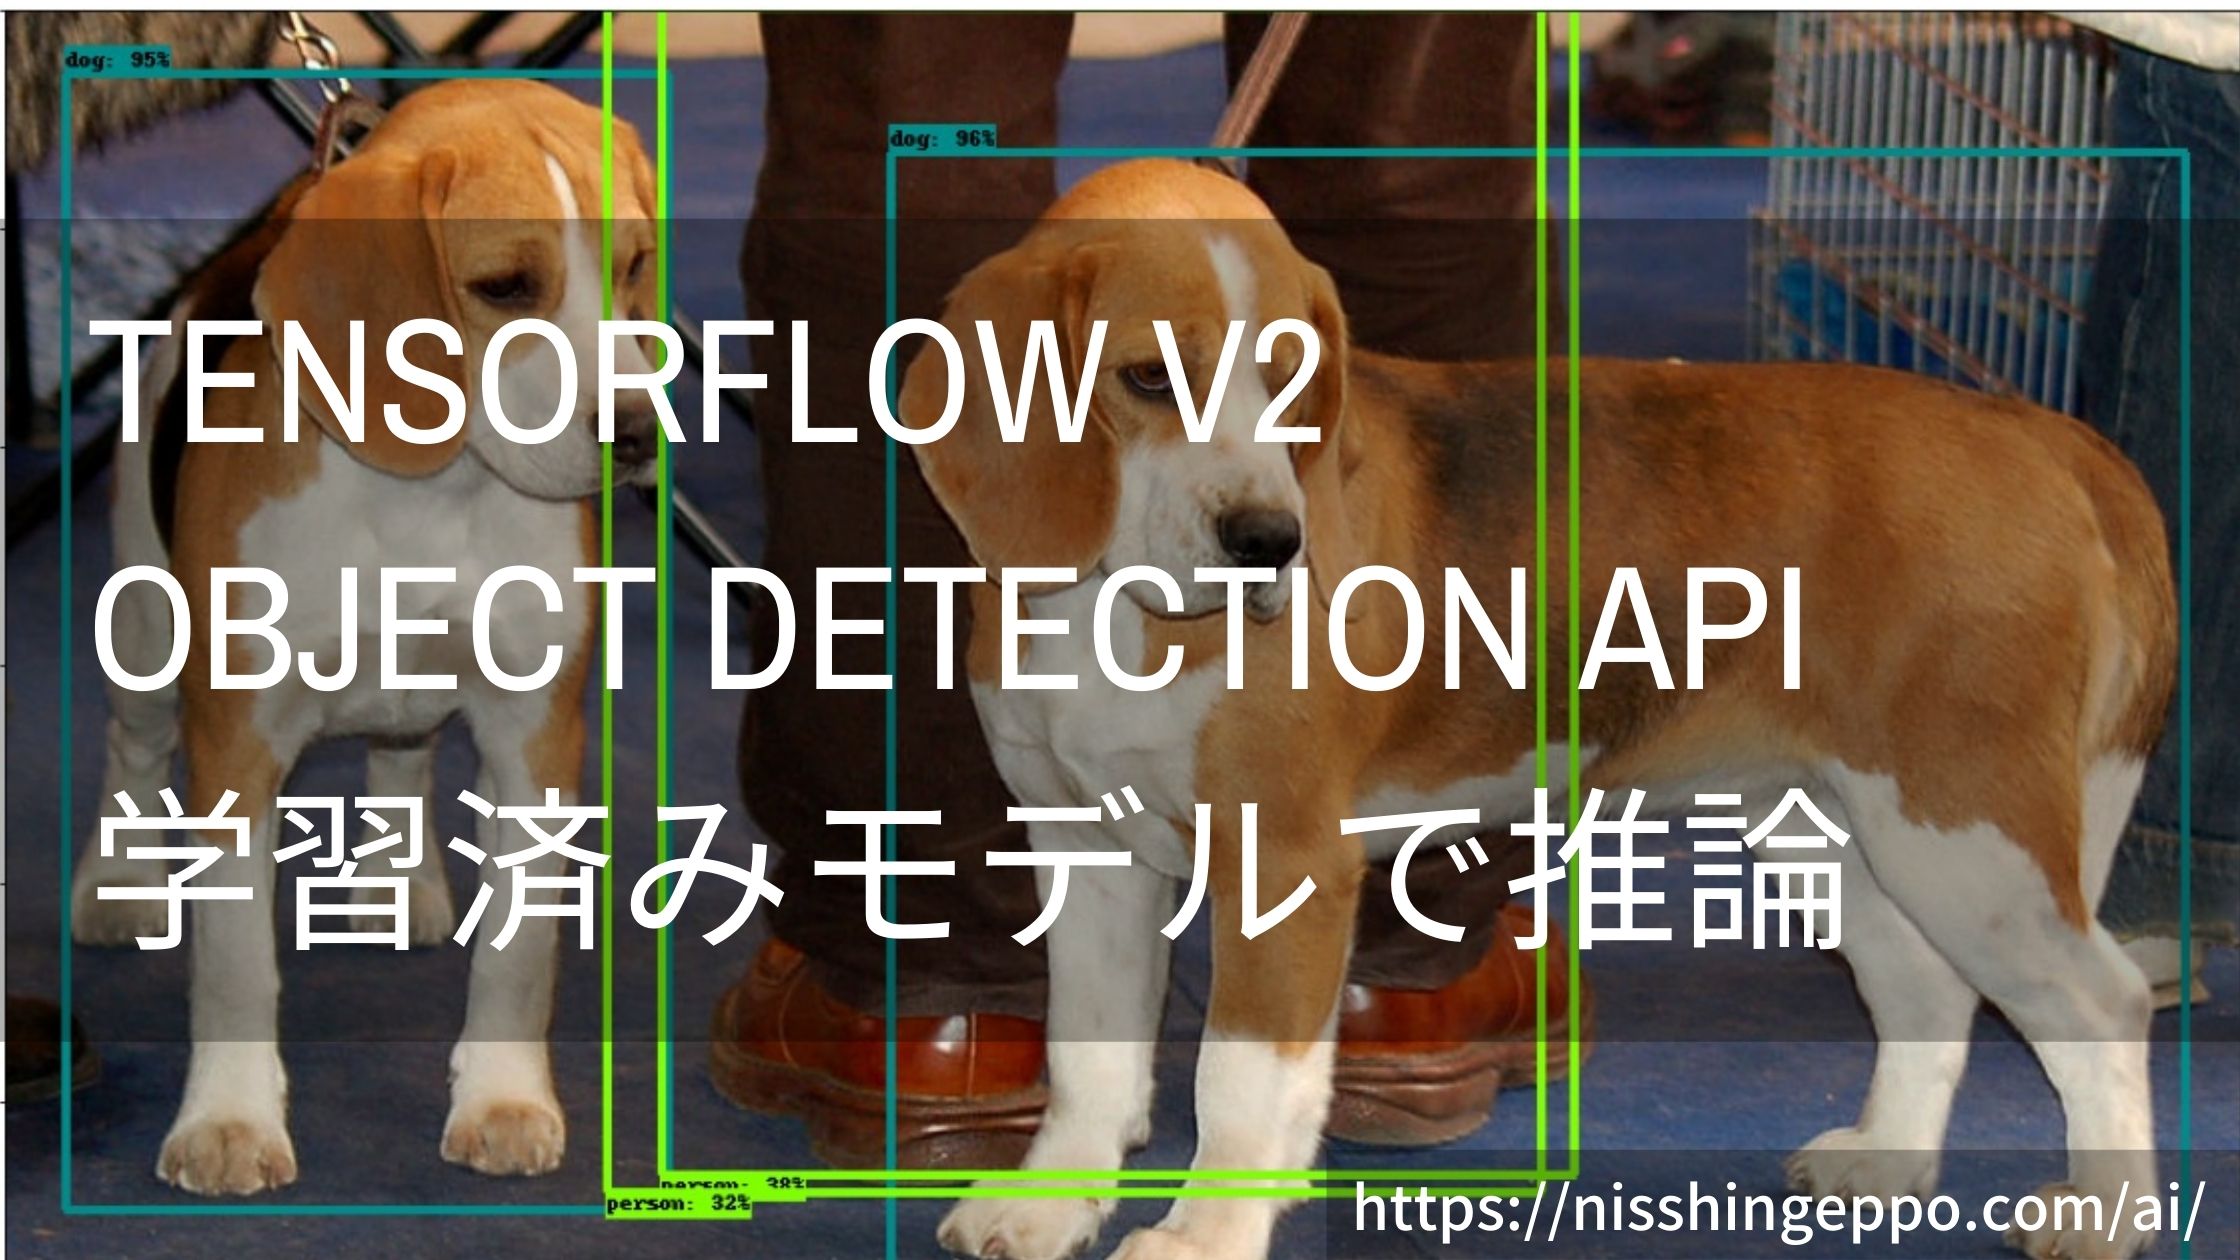
- tensorflowの学習済みモデルのダウンロード方法
- Object Detection APIの推論方法
Object Detection APIの公式チュートリアルに則って、物体検出します。
このチュートリアルでは、学習済みのモデルをダウンロードしてきて物体検出を行います。
ライブラリのインポート
物体検出に必要なライブラリをインポートしていきます。
import os
import pathlib
from object_detection.utils import visualization_utils as viz_utils
from object_detection.utils import label_map_util
import matplotlib.pyplot as plt
import tensorflow as tf
import subprocess
import numpy as np
from PIL import Image
import time
import warnings
warnings.filterwarnings('ignore')   # Suppress Matplotlib warnings
%matplotlib inline
tensorflowの環境設定
出力ログとGPUメモリに関する設定をしていきます。
os.environ['TF_CPP_MIN_LOG_LEVEL'] = '2'    # Suppress TensorFlow logging (1)
tf.get_logger().setLevel('ERROR')           # Suppress TensorFlow logging (2)

# Enable GPU dynamic memory allocation
gpus = tf.config.experimental.list_physical_devices('GPU')
for gpu in gpus:
    tf.config.experimental.set_memory_growth(gpu, True)
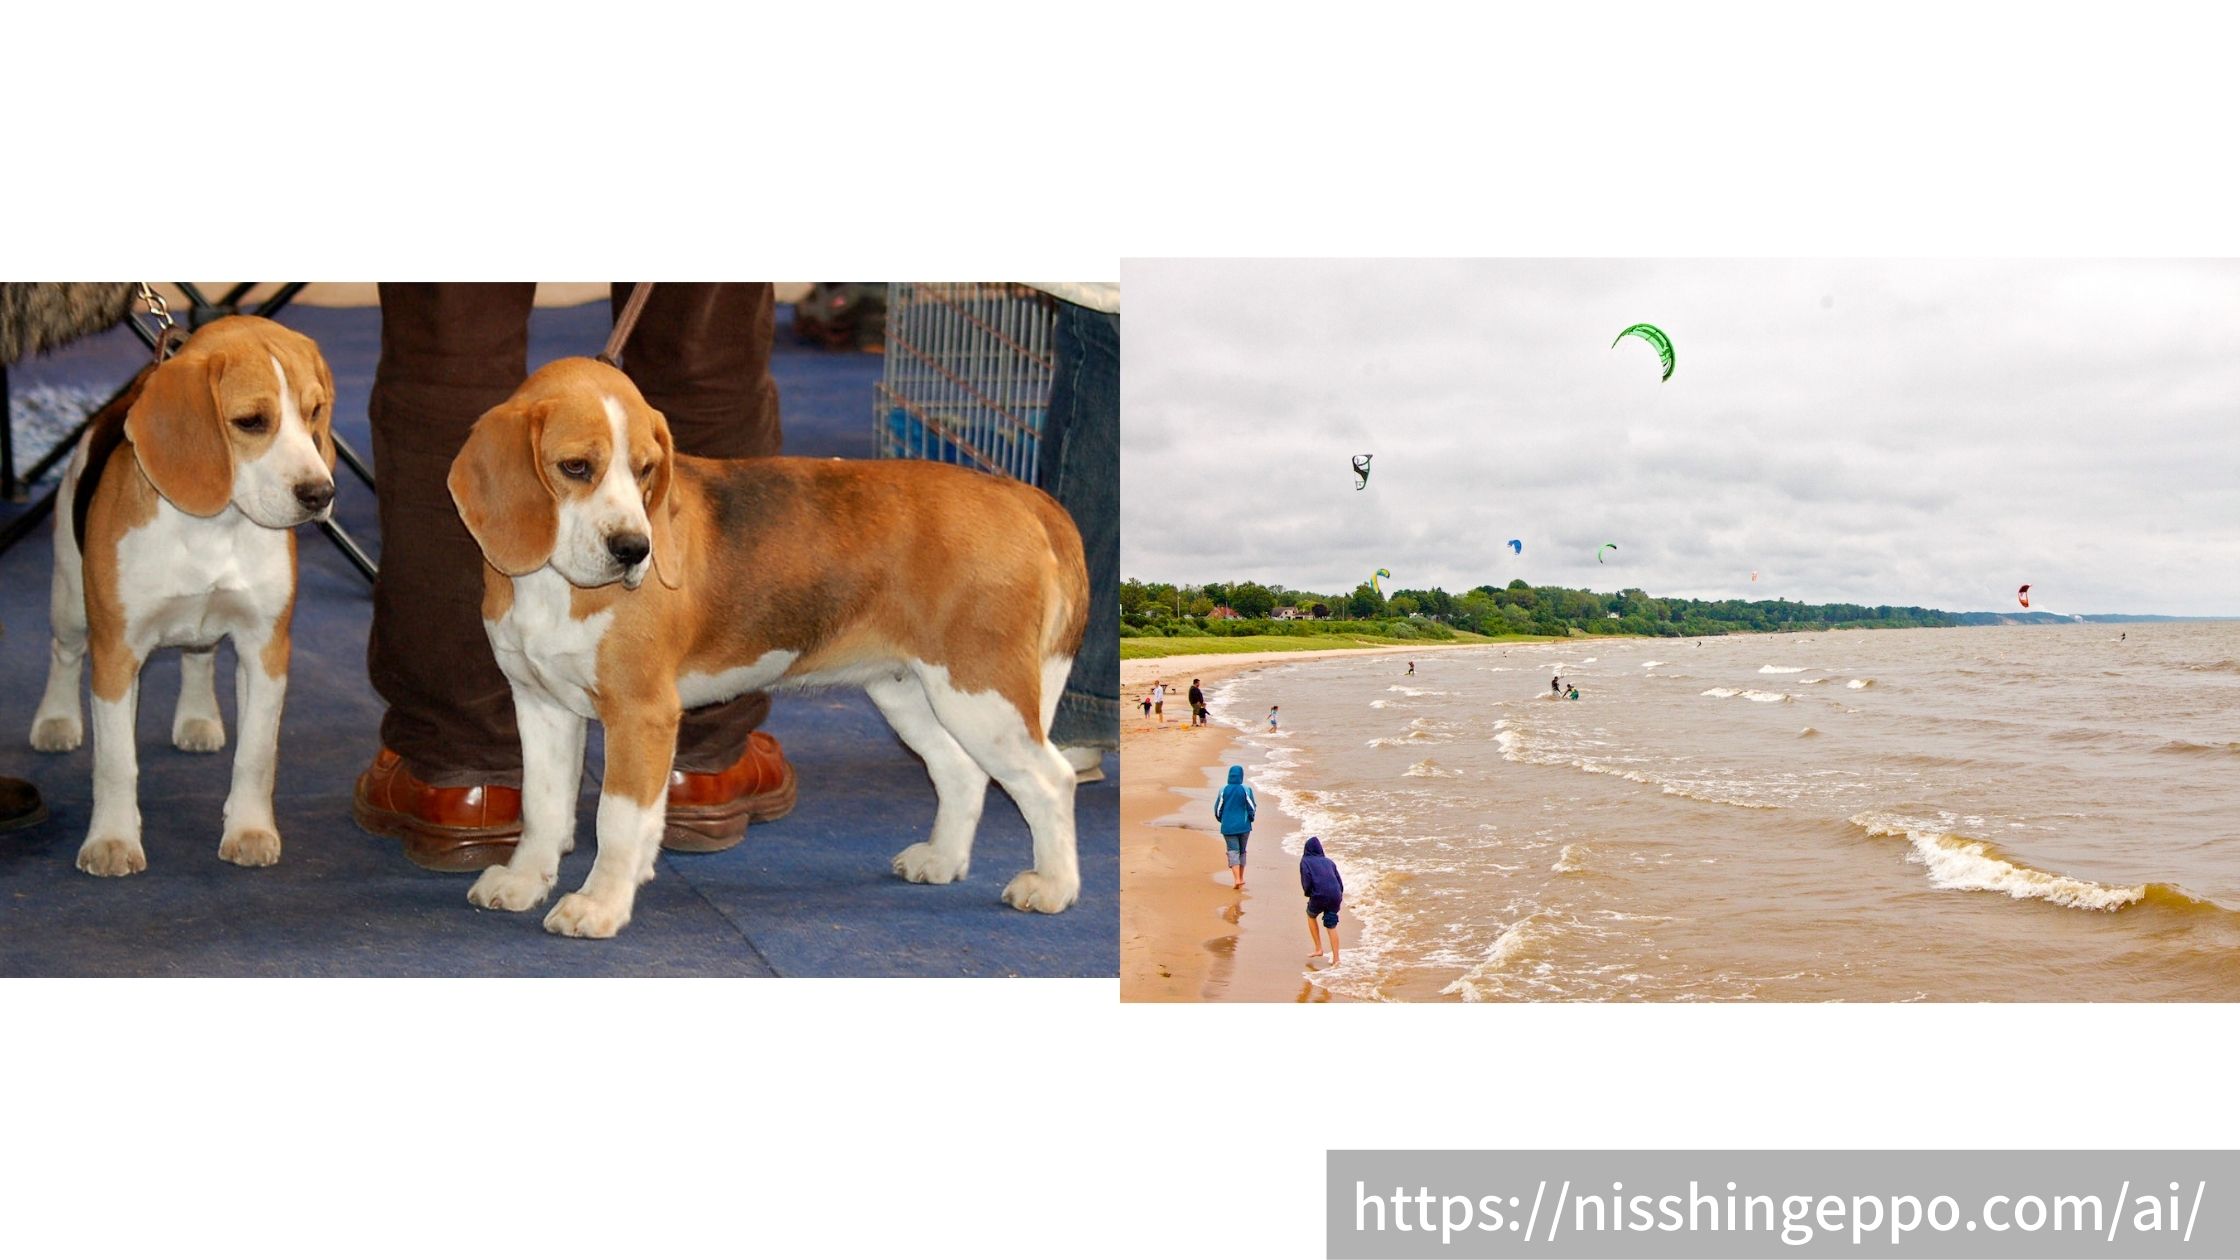
テスト用画像のダウンロード
このチュートリアルで使用するテスト画像をダウンロードします。
TensorFlow Model Gardenからテスト画像をダウンロードし、./datasets/testdata/ディレクトリ内に保存しています。
ダウンロード関数を作成する
def download_images(download_dir):
    base_url = 'https://raw.githubusercontent.com/tensorflow/models/master/research/object_detection/test_images/'
    filenames = ['image1.jpg', 'image2.jpg']
    # ディレクトリ作成
    if not os.path.exists(download_dir):
        subprocess.run(['mkdir', '-p', download_dir])

    image_paths = []
    for filename in filenames:
        image_path = tf.keras.utils.get_file(fname=filename,
                                            origin=base_url + filename,
                                            untar=False,
                                            cache_dir=download_dir,
                                            cache_subdir="testdata")
        image_path = pathlib.Path(image_path)
        image_paths.append(str(image_path))
    return image_paths
画像のダウンロード
保存先を指定して、画像をダウンロードします。
DOWNLOAD_DIR = "./datasets"
IMAGE_PATHS = download_images(DOWNLOAD_DIR)
IMAGE_PATHS
犬と海辺の画像がダウンロード出来ました。
学習済みモデルのダウンロード
このチュートリアルで使用する学習済みモデルをダウンロードします。
TensorFlow 2 Detection Model Zooから学習済みモデルをダウンロードし、./experience/pretrained/centernet_hg104_1024x1024_coco17_tpu-32/ディレクトリ内に保存しています。
学習済みモデルのダウンロード関数を作成する
def download_model(model, output_dir):
    URL = 'http://download.tensorflow.org/models/object_detection/tf2/20200711/%s.tar.gz' % model
    DOWNLOAD_PATH = '%s/%s.tar.gz' % (output_dir, model)
    MODEL_DIR = os.path.join(output_dir, model)

    # ディレクトリ作成
    if not os.path.exists(MODEL_DIR):
        subprocess.run(['mkdir', '-p', MODEL_DIR])

    if os.path.exists(MODEL_DIR):
        subprocess.run(['rm', '-r', MODEL_DIR])
        subprocess.run(['mkdir', MODEL_DIR])

    print("Downloading %s.." % model)
    p = subprocess.run(['wget', '--show-progress', '--progress=bar:force', '-O', DOWNLOAD_PATH, URL])

    print("Unpacking..")
    p = subprocess.run(['tar', 'zxvf', DOWNLOAD_PATH, '-C', output_dir])
    p = subprocess.run(['rm', DOWNLOAD_PATH])

    print("Checking..")
    pbfile = os.path.join(MODEL_DIR, 'saved_model')
    print(pbfile)
    print("Success!")

    return MODEL_DIR
学習済みモデルのダウンロード
ダウンロードするモデルと保存先を指定して、モデルのダウンロードします。
# 学習済みモデルのダウンロードに関する設定
MODEL_NAME = 'centernet_hg104_1024x1024_coco17_tpu-32'
OUTPUT_DIR = './experience/pretrained'

# 事前学習済みモデルのダウンロード
PATH_TO_MODEL_DIR = download_model(MODEL_NAME, OUTPUT_DIR)
ラベルのダウンロード
このチュートリアルで使用する学習済みモデルのラベルをダウンロードします。
Githubからラベルをダウンロードし、./experience/pretrained/centernet_hg104_1024x1024_coco17_tpu-32/ディレクトリ内に保存しています。
ラベルのダウンロード関数を作成する
def download_labels(filename,download_dir):
    base_url = 'https://raw.githubusercontent.com/tensorflow/models/master/research/object_detection/data/'
    label_dir = tf.keras.utils.get_file(fname=filename,
                                        origin=base_url + filename,
                                        untar=False,
                                        cache_dir=download_dir,
                                        cache_subdir="")
    label_dir = pathlib.Path(label_dir)
    return str(label_dir)
ラベルのダウンロード
学習済みモデルはcocoデータセットで学習しているので、それに対応したラベルをダウンロードします。
LABEL_FILENAME = 'mscoco_label_map.pbtxt'
PATH_TO_LABELS = download_labels(LABEL_FILENAME,PATH_TO_MODEL_DIR)
これで必要なファイルは全て準備できました。
モデルのロード
学習済みモデルとラベルファイルを読み込んでいきます。
モデルの読み込み
PATH_TO_SAVED_MODEL = PATH_TO_MODEL_DIR + "/saved_model"

print('Loading model...', end='')
start_time = time.time()

# Load saved model and build the detection function
detect_fn = tf.saved_model.load(PATH_TO_SAVED_MODEL)

end_time = time.time()
elapsed_time = end_time - start_time
print('Done! Took {} seconds'.format(elapsed_time))
ラベルの読み込み
category_index = label_map_util.create_category_index_from_labelmap(PATH_TO_LABELS, use_display_name=True)
推論の実施
テスト画像について推論を行います。
画像を読み込む関数を作成する
画像ファイルを読み込んで、numpy配列に変換する関数です。
def load_image_into_numpy_array(path):
    """Load an image from file into a numpy array.

    Puts image into numpy array to feed into tensorflow graph.
    Note that by convention we put it into a numpy array with shape
    (height, width, channels), where channels=3 for RGB.

    Args:
      path: the file path to the image

    Returns:
      uint8 numpy array with shape (img_height, img_width, 3)
    """
    return np.array(Image.open(path))
推論
for image_path in IMAGE_PATHS:

    print('Running inference for {}... '.format(image_path), end='')

    image_np = load_image_into_numpy_array(image_path)

    # The input needs to be a tensor, convert it using `tf.convert_to_tensor`.
    input_tensor = tf.convert_to_tensor(image_np)
    # The model expects a batch of images, so add an axis with `tf.newaxis`.
    input_tensor = input_tensor[tf.newaxis, ...]

    detections = detect_fn(input_tensor)

    num_detections = int(detections.pop('num_detections'))
    detections = {key: value[0, :num_detections].numpy()
                  for key, value in detections.items()}
    detections['num_detections'] = num_detections

    # detection_classes should be ints.
    detections['detection_classes'] = detections['detection_classes'].astype(np.int64)

    image_np_with_detections = image_np.copy()

    viz_utils.visualize_boxes_and_labels_on_image_array(
        image_np_with_detections,
        detections['detection_boxes'],
        detections['detection_classes'],
        detections['detection_scores'],
        category_index,
        use_normalized_coordinates=True,
        max_boxes_to_draw=200,
        min_score_thresh=.30,
        agnostic_mode=False)

    plt.figure(figsize=(20, 20))
    plt.imshow(image_np_with_detections)
    print('Done')
plt.savefig('figure.jpg')
plt.show()
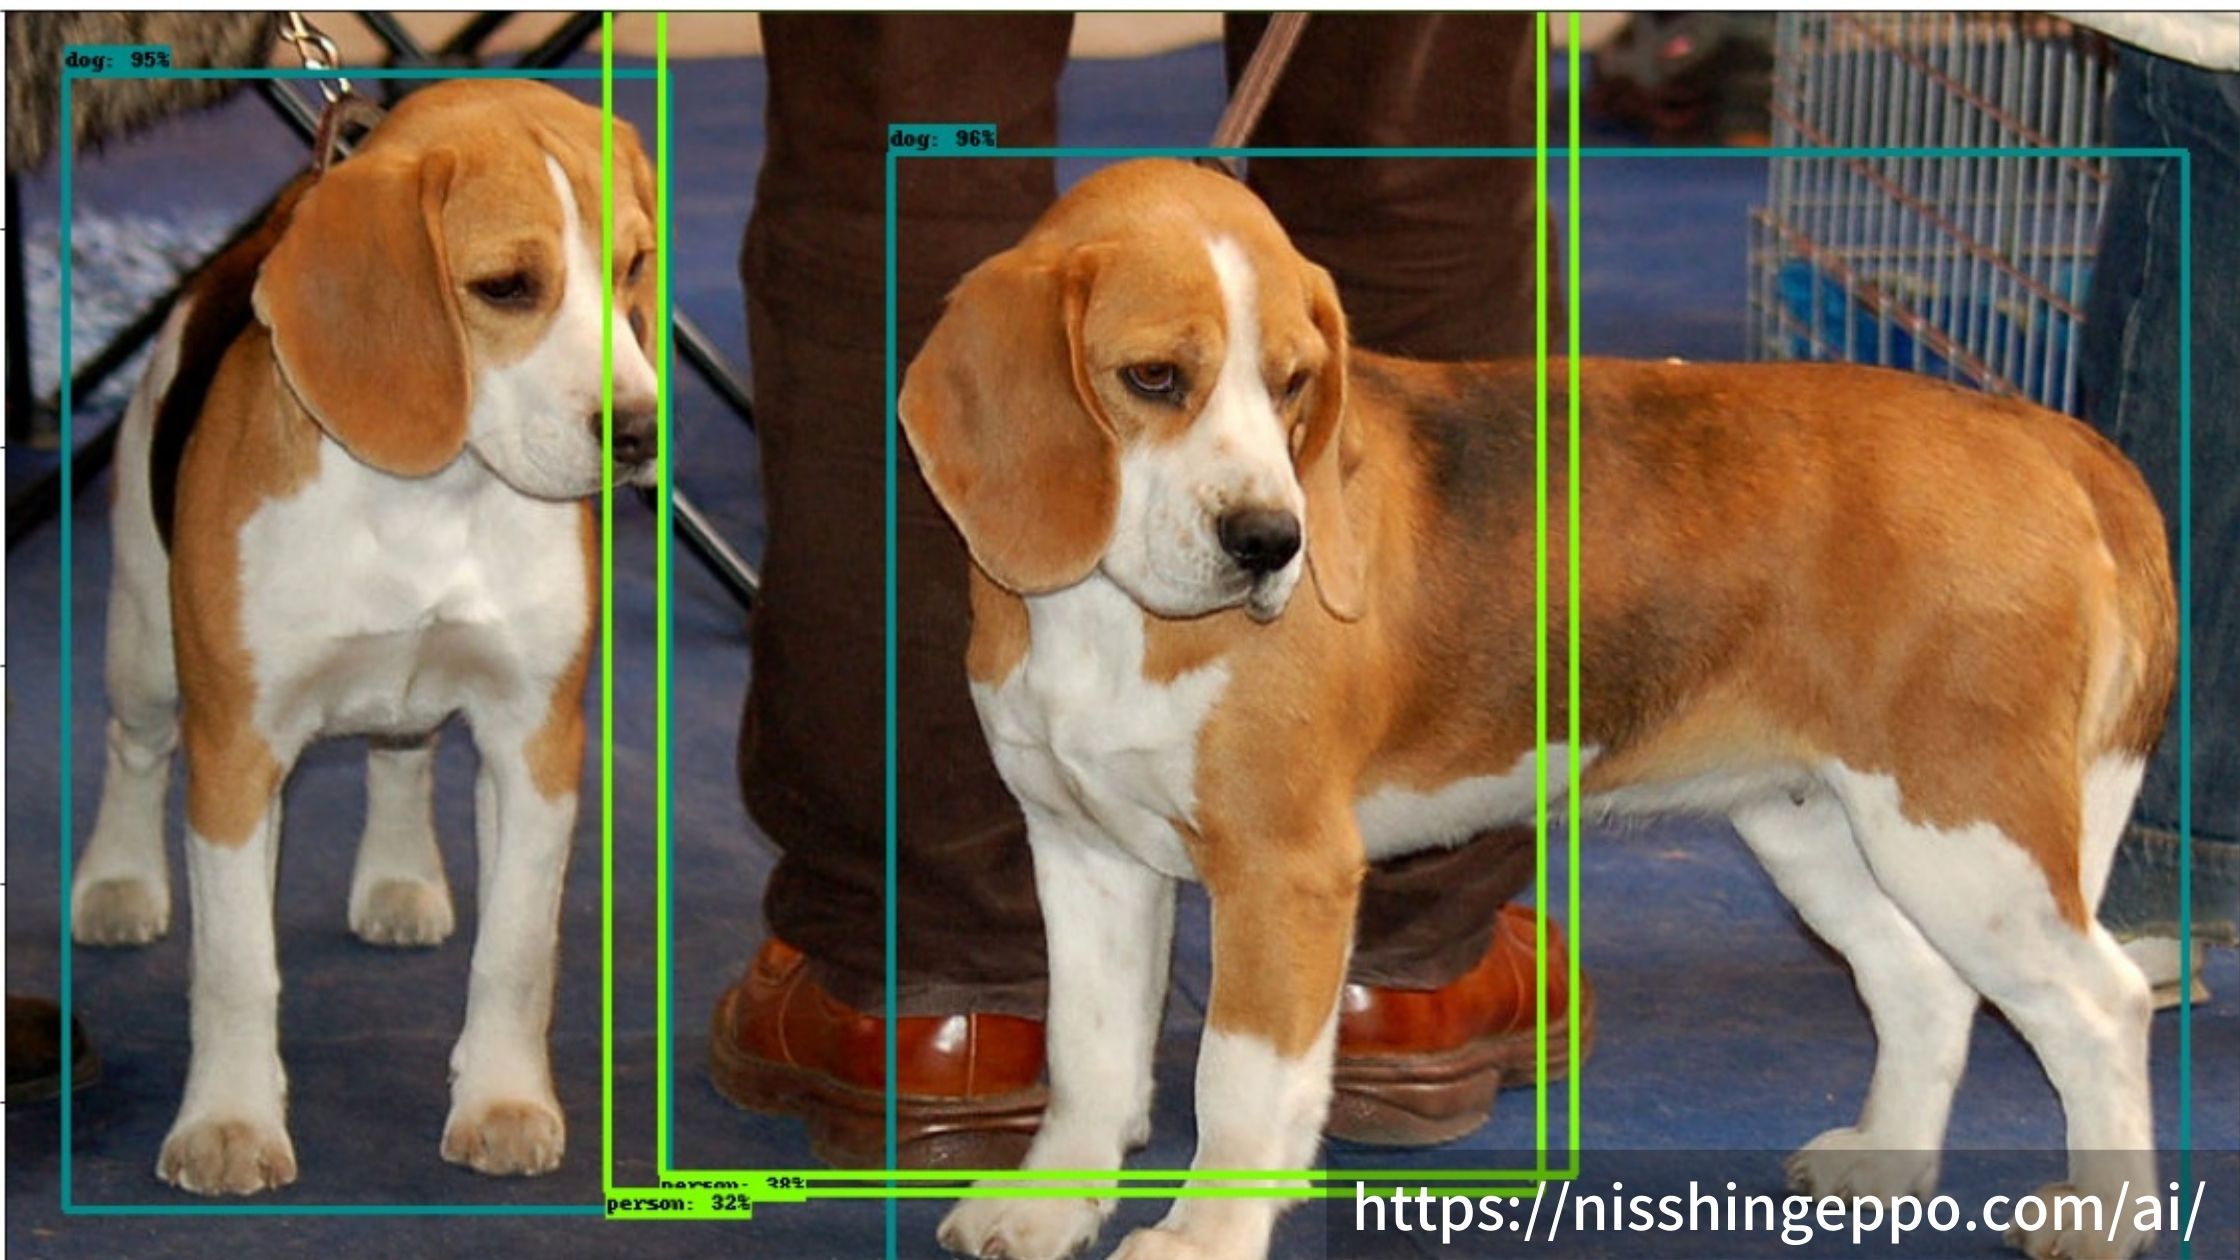
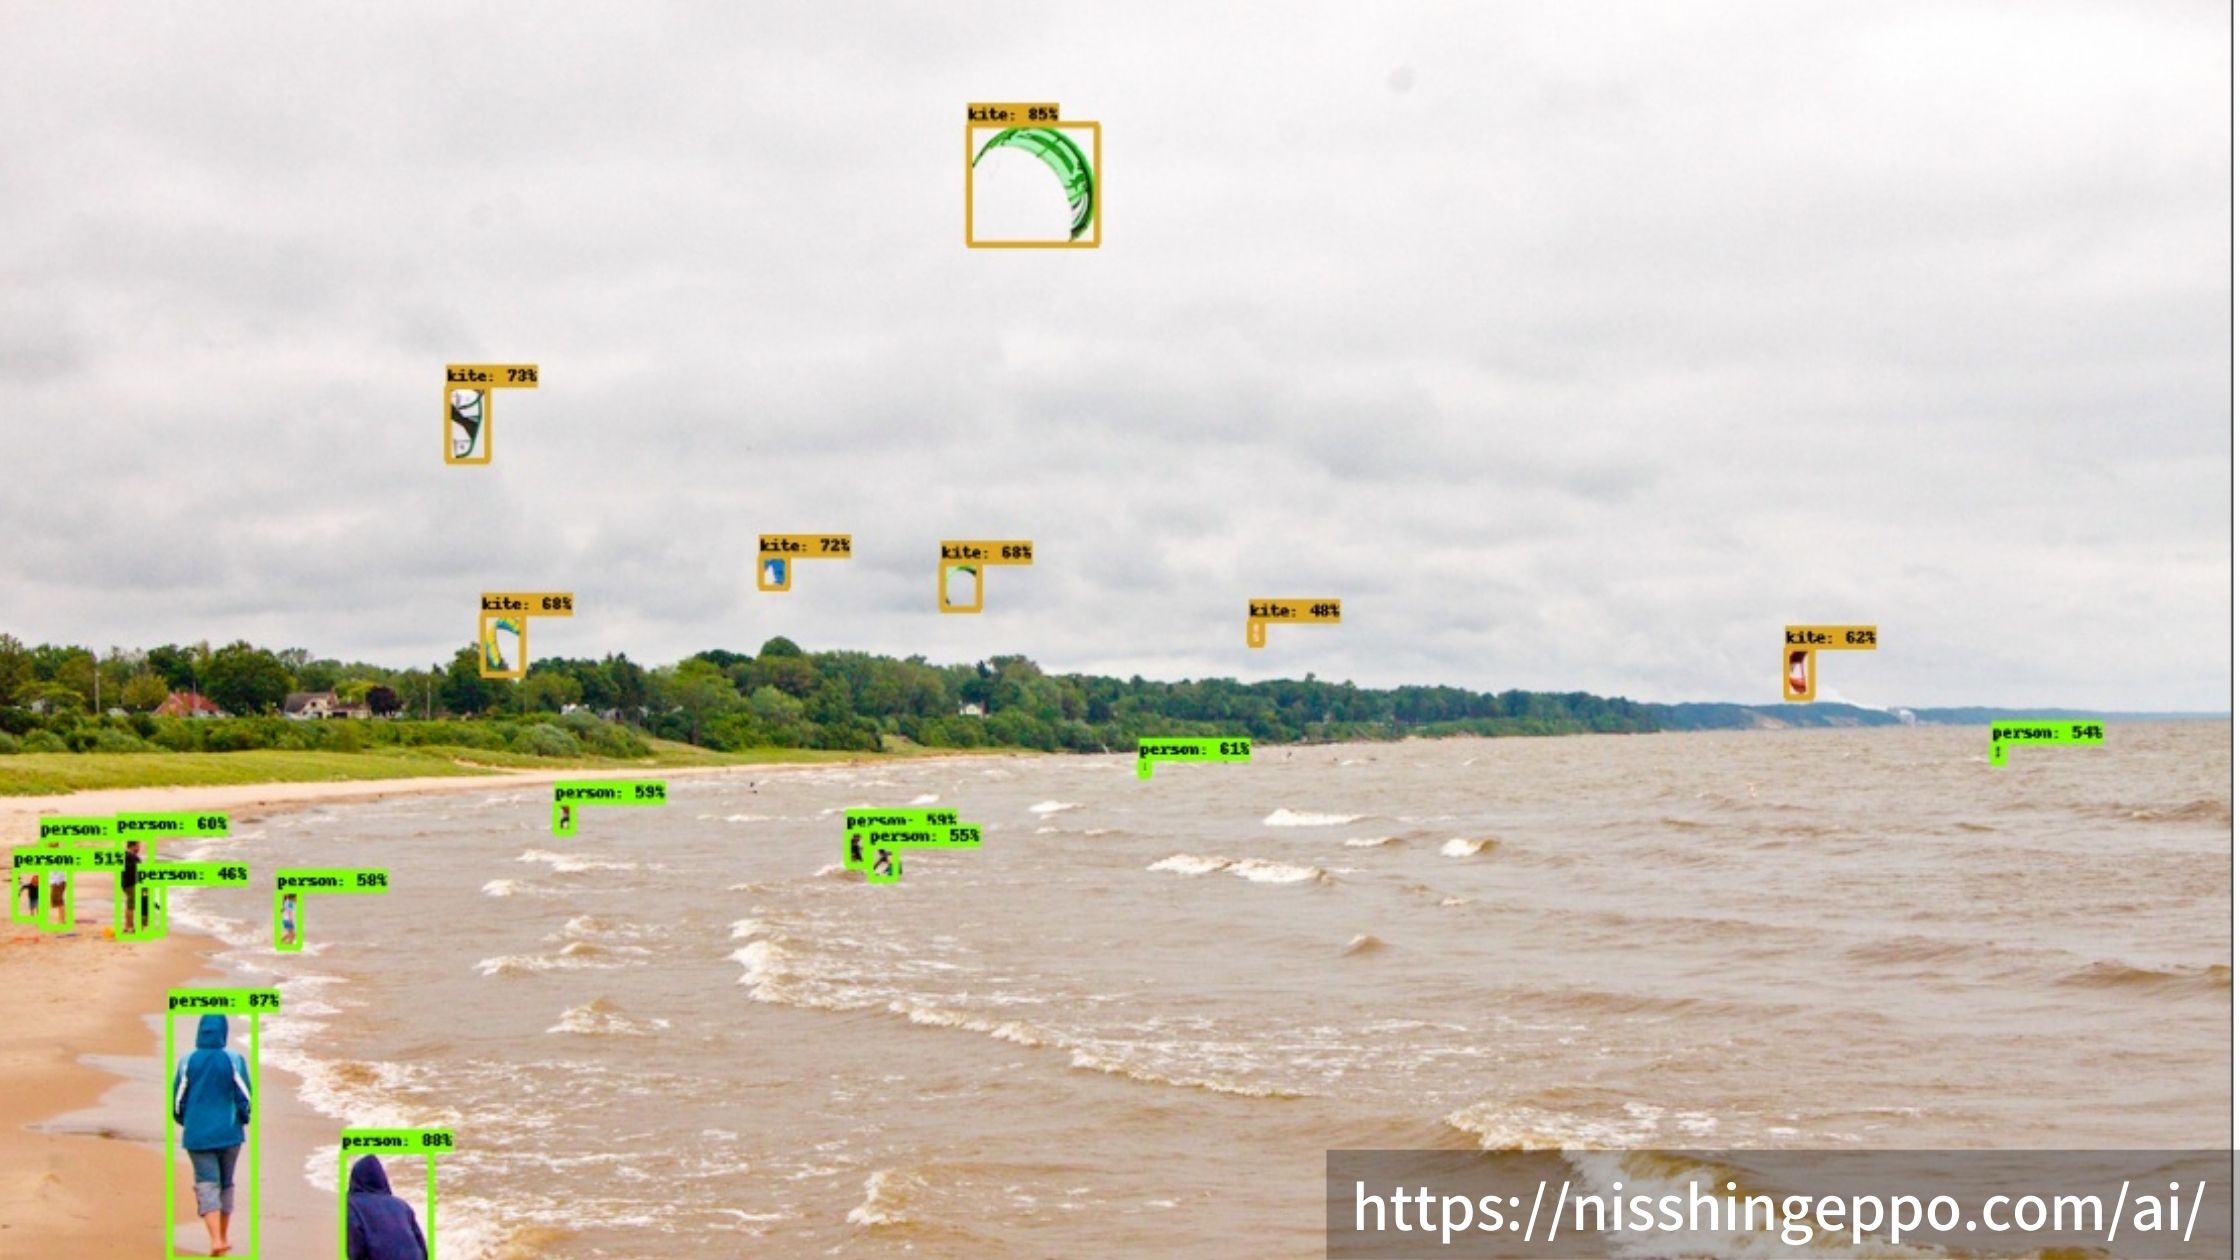
犬や人、カイトを検出することが出来ました。
まとめ
Object Detection APIで学習済みモデルを使って推論を行いました。
用意されたテスト画像、学習済みモデル、ラベルのダウンロードを行いました。
事前学習済みモデルで推論を行いラベルに書かれている物体を検出することが出来ました。
参考文献

コメント