


この記事を読んで分かること
- Tensorflow Hubでスタイル変換をする方法
Tensorflow Hubの公式チュートリアルに則って、画像のスタイル変換をします。 このチュートリアルでは、学習済みのモデルをダウンロードしてきてスタイル変換を行います。
ライブラリのインポート
スタイル変換に必要なライブラリをインポートしていきます。
import functools
import os

from matplotlib import gridspec
import matplotlib.pylab as plt
import numpy as np
import tensorflow as tf
import tensorflow_hub as hub

print("TF Version: ", tf.__version__)
print("TF Hub version: ", hub.__version__)
print("Eager mode enabled: ", tf.executing_eagerly())
print("GPU available: ", tf.config.list_physical_devices('GPU'))
画像の読み込みと表示
変換用の元画像とスタイル用の画像を読み込んで表示します。
画像の読み込みと表示の関数を作成
def crop_center(image):
  """Returns a cropped square image."""
  shape = image.shape
  new_shape = min(shape[1], shape[2])
  offset_y = max(shape[1] - shape[2], 0) // 2
  offset_x = max(shape[2] - shape[1], 0) // 2
  image = tf.image.crop_to_bounding_box(
      image, offset_y, offset_x, new_shape, new_shape)
  return image

@functools.lru_cache(maxsize=None)
def load_image(image_url, image_size=(256, 256), preserve_aspect_ratio=True):
  """Loads and preprocesses images."""
  # Cache image file locally.
  image_path = tf.keras.utils.get_file(os.path.basename(image_url)[-128:], image_url)
  # Load and convert to float32 numpy array, add batch dimension, and normalize to range [0, 1].
  img = tf.io.decode_image(
      tf.io.read_file(image_path),
      channels=3, dtype=tf.float32)[tf.newaxis, ...]
  img = crop_center(img)
  img = tf.image.resize(img, image_size, preserve_aspect_ratio=True)
  return img

def show_n(images, titles=('',)):
  n = len(images)
  image_sizes = [image.shape[1] for image in images]
  w = (image_sizes[0] * 6) // 320
  plt.figure(figsize=(w * n, w))
  gs = gridspec.GridSpec(1, n, width_ratios=image_sizes)
  for i in range(n):
    plt.subplot(gs[i])
    plt.imshow(images[i][0], aspect='equal')
    plt.axis('off')
    plt.title(titles[i] if len(titles) > i else '')
  plt.show()
画像の読み込みと表示
# @title Load example images { display-mode: "form" }
content_image_url = 'https://upload.wikimedia.org/wikipedia/commons/thumb/f/fd/Golden_Gate_Bridge_from_Battery_Spencer.jpg/640px-Golden_Gate_Bridge_from_Battery_Spencer.jpg' # @param {type:"string"}
style_image_url = 'https://upload.wikimedia.org/wikipedia/commons/0/0a/The_Great_Wave_off_Kanagawa.jpg' # @param {type:"string"}
output_image_size = 384 # @param {type:"integer"}
# The content image size can be arbitrary.
content_img_size = (output_image_size, output_image_size)
# The style prediction model was trained with image size 256 and it's the
# recommended image size for the style image (though, other sizes work as
# well but will lead to different results).
style_img_size = (256, 256) # Recommended to keep it at 256.
content_image = load_image(content_image_url, content_img_size)
style_image = load_image(style_image_url, style_img_size)
style_image = tf.nn.avg_pool(style_image, ksize=[3,3], strides=[1,1], padding='SAME')
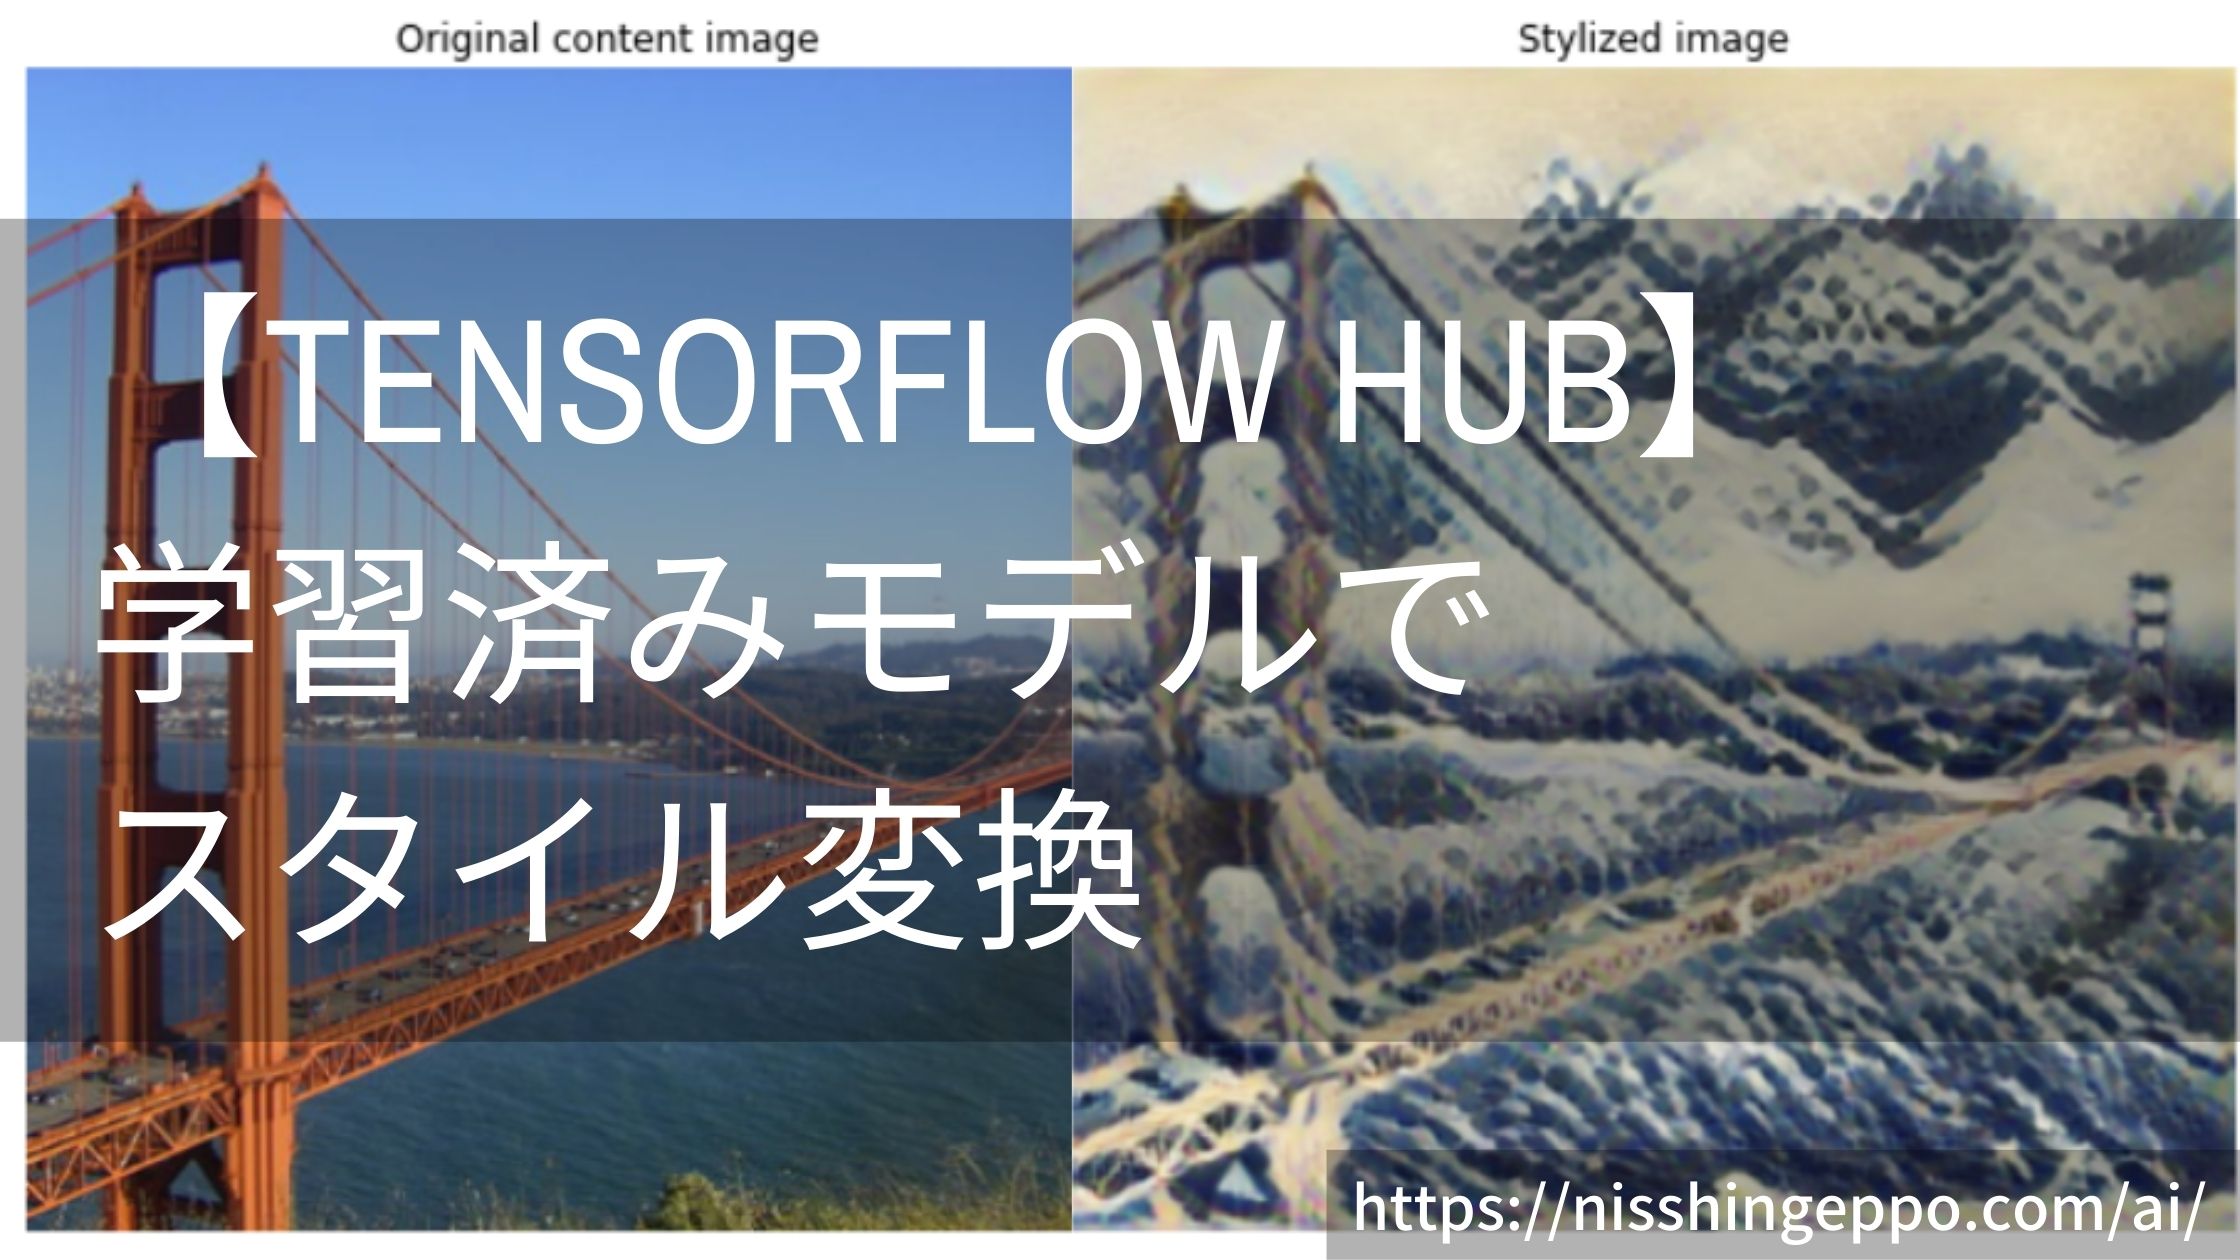
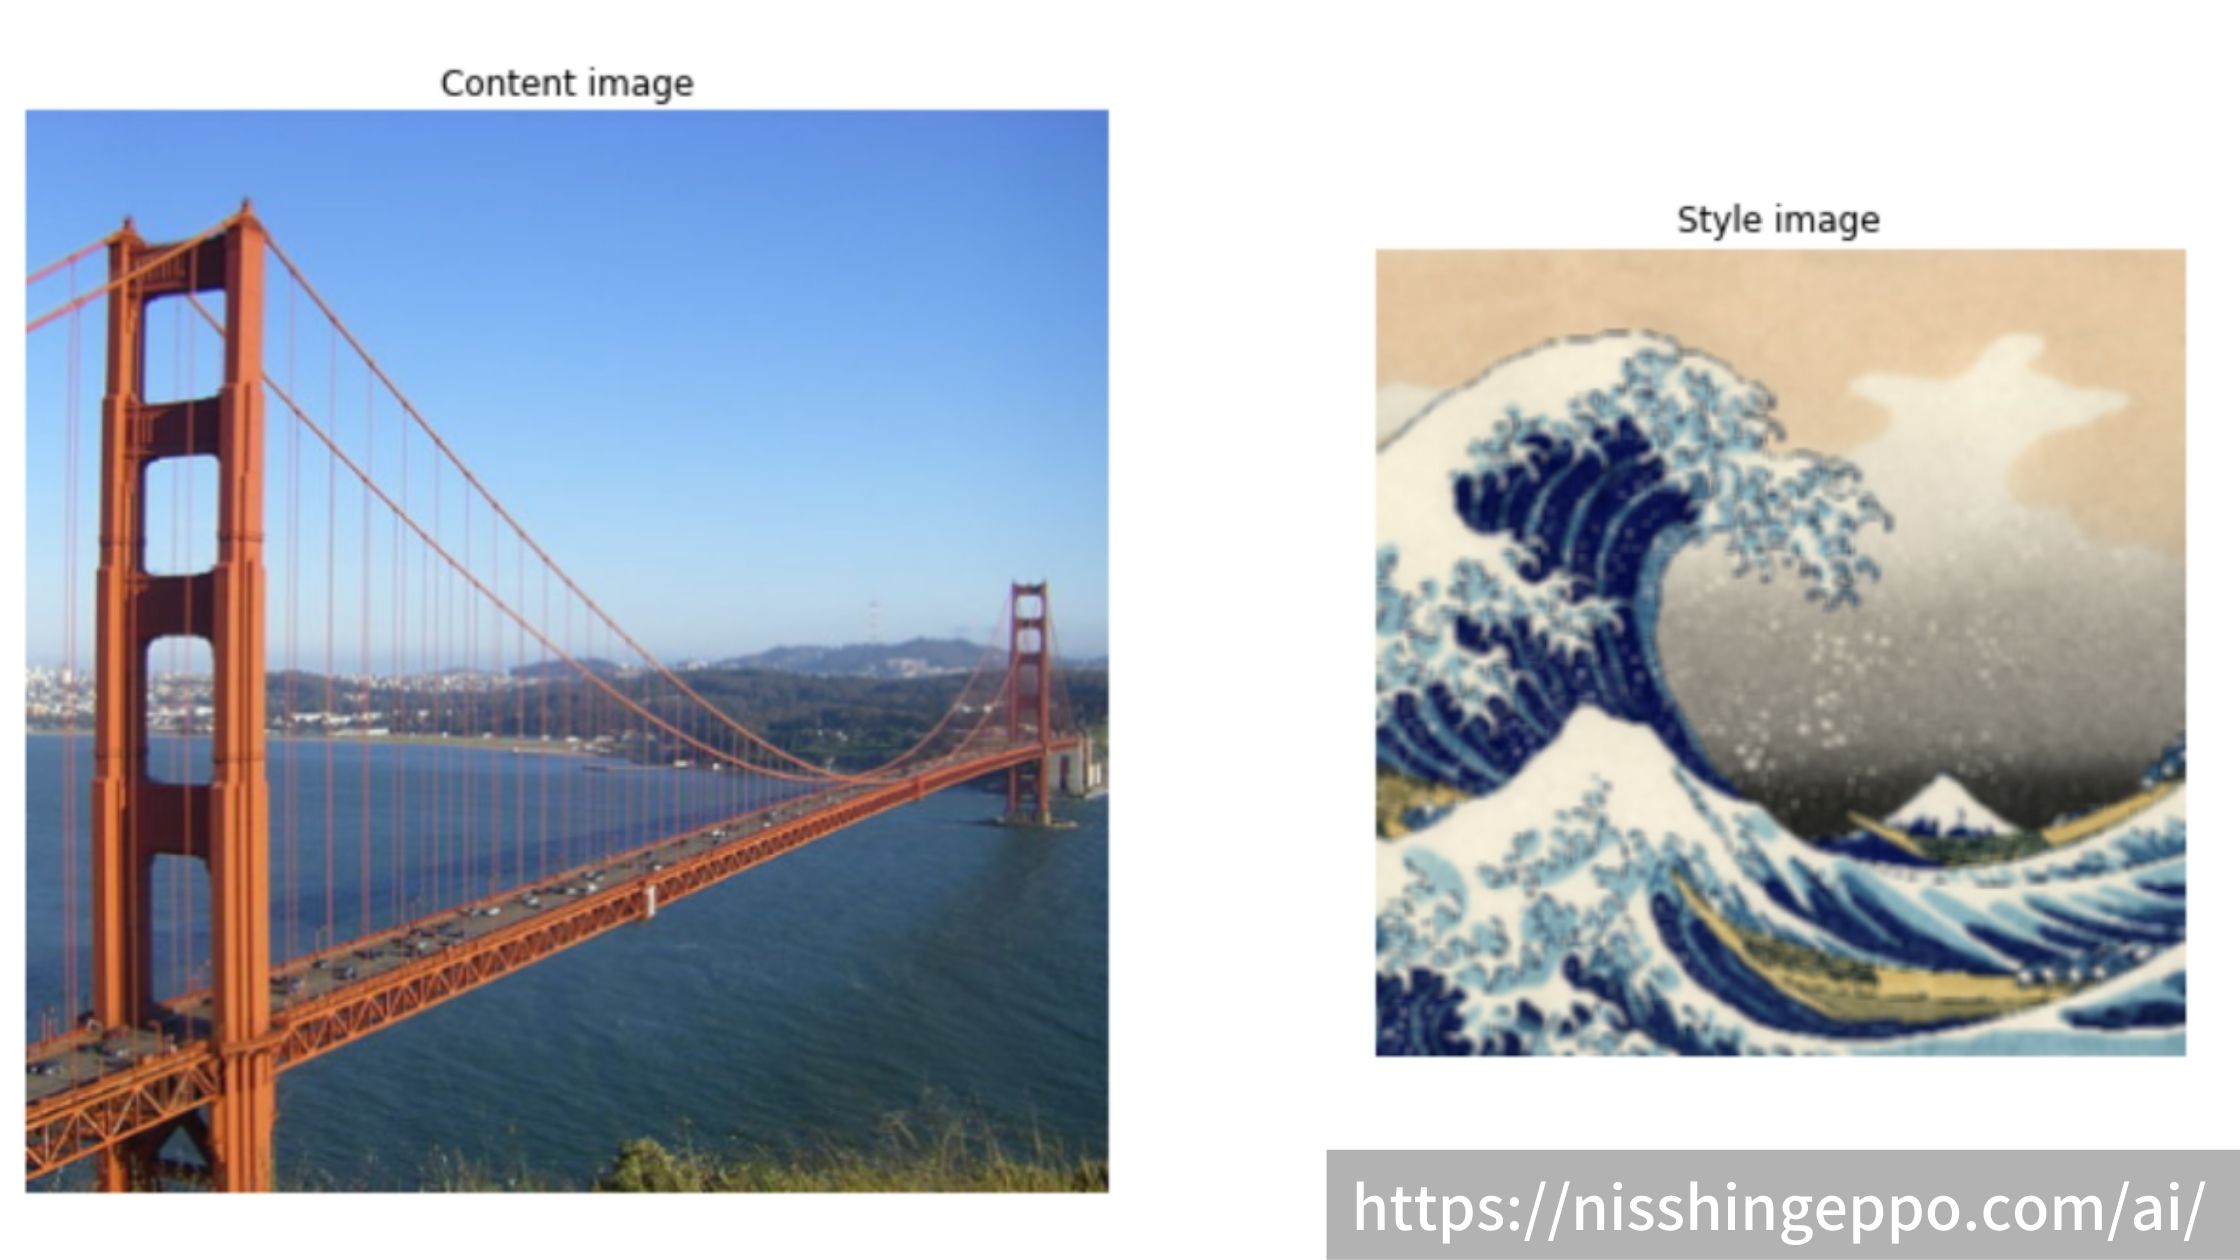
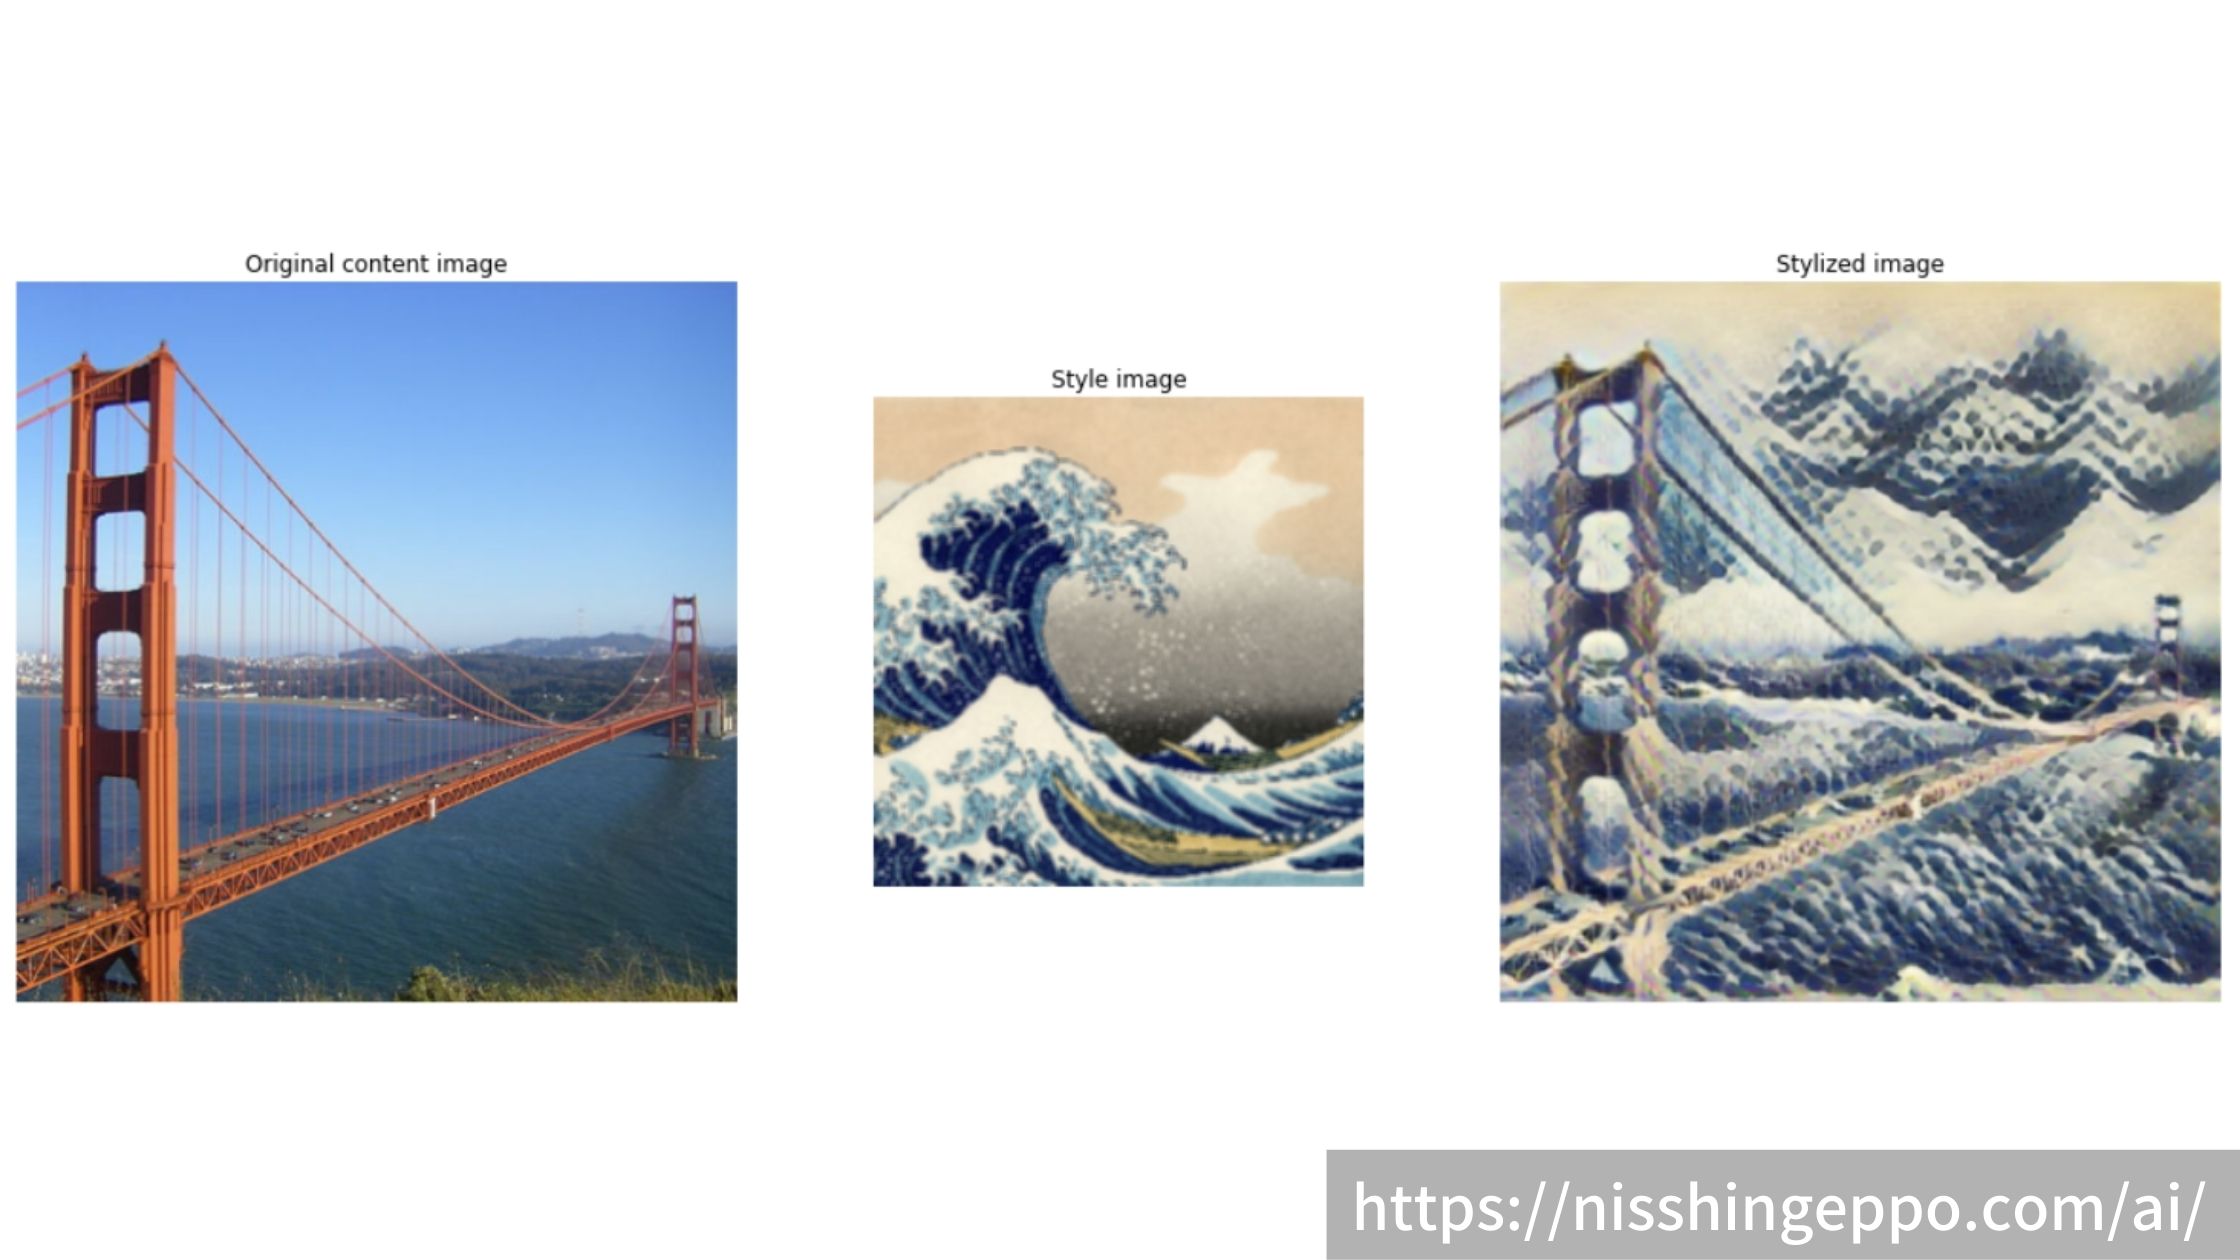
show_n([content_image, style_image], ['Content image', 'Style image'])
元画像は橋の写真で、スタイル画像は冨嶽三十六景を使用します。
学習済みモデルの読み込み
学習済みモデルをダウンロードして読み込みます。
hub_handle = 'https://tfhub.dev/google/magenta/arbitrary-image-stylization-v1-256/2'
hub_module = hub.load(hub_handle)

outputs = hub_module(content_image, style_image)
stylized_image = outputs[0]
スタイル変換の実行
スタイル変換を行っていきます。
outputs = hub_module(tf.constant(content_image), tf.constant(style_image))
stylized_image = outputs[0]

show_n([content_image, style_image, stylized_image], titles=['Original content image', 'Style image', 'Stylized image'])
写真から絵画のテイストにスタイル変換をすることが出来ました。
まとめ
Tensorflow Hubで用意されたモデルを使って簡単にスタイル変換することが出来ました。
Tensorflow Hubでは他にも学習済みのモデルがたくさん提供されているのでため是非試してみてください。
参考文献

Fast Style Transfer for Arbitrary Styles | TensorFlow Hub
www.tensorflow.org


コメント